Monday, June 18, 2012

Kim and Danny's Wine Rack


 Just want to shout out how awesome this wine rack turned out by Danny for his wonderful wife Kim.

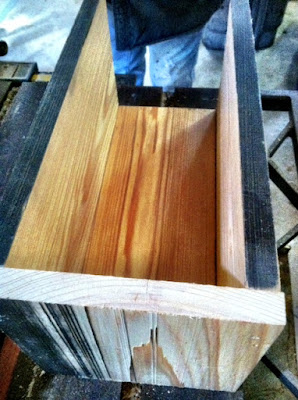
You can use pallets or wood from the lumber yard stained with a wool pad soaked overnight in vinegar to get the aged look. They used a crate the for top picture and hung it directly to the wall making it a shelf!

I think this is just so awesome! Good job Danny--lucky Kim!

Here are some tutorials I found for this: tutorial 1 and tutorial 2 .


***Be sure to always wear eye, mouth, and hand protection when working with pallets!


Big Cheer Bow DIY

Cheer Bows Must Be Big!


For this you will need the following:

Three sizes of ribbon ( We used 1 3/8", 1/4", 7/8")
FabriTac Glue or a Sewing Machine
String or Zip Tie
Hot Glue Gun with Glue
Scissors
No Fray or Lighter
Ruler
Hair Band


On Pinterest, I found this tutorial by TotallyTheBomb. I followed it with a little deviation.


The first thing we did was to cut the 7/8" ribbon to 30 inches for the center. Then we cut 2 pieces of each: 1 3/8" and 1/4" ribbon to 30 inches.

Then we laid out the base 1 3/8" two ribbons side by side. We used Fabritac to the backside of the middle 7/8" ribbon and made sure to coat the edges as well as the middle with the glue. Work quickly, because the glue dries fast. Lay the middle ribbon on the base 2 ribbons. Press and allow time to dry. Once dried, we added a thin ribbon to each side to frame it and show it off a bit. On the polka dot photo, we sewed the ribbons on. You can see that the ribbon with the Fabritac lays flat nicer while the sewn ribbon puckers. -See above.


Taking the ribbon as shown above, loop and fold it across. It will look like an awareness ribbon. Take the top of the loop and bring it downward to form the bow. Now, pinch the center and tie off with a zip tie or string cinching it tight. This makes a bow. :) 


Next, using the same ribbon for the middle, tie a knot and cut about two inches above and below the knot. Hot glue the knot to the front of the bow. On the back of the bow, take the knotted piece and wrap it around a hair band then hot glue it down and trim off the extra.  Fold the bottom of the ribbon and cut from the outside upward if you like the inverted "V" look. If not, then just trim the edges. Be sure to either quick burn the end of the bow (adults only) or use a no fray solution.


Fabric Dry Erase Frame

While scanning ideas on Pinterest, I came across this Burlap Dry Erase Board posted by JillRuth. I had everything to make it so I re-made my previous post for a dry erase frame.
It is simple, but I love it in white!


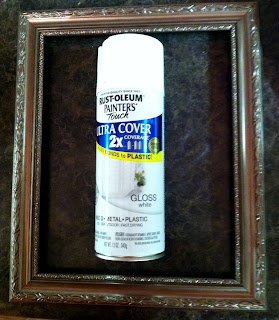
The first thing I did was clean my plastic frame off and use a plastic friendly spray paint to coat it. I sprayed two coats on it and let it dry overnight.


I cut a piece of fabric resembling burlap, but with a tight weave, and placed it in the frame with a piece of card stock behind it to hide the black backboard to the frame.

The only thing I noticed after taking this photo is that there is a little pucker in the bottom right corner. I probably should have taped the fabric around the card stock and backboard for a tighter fit.

Sunday, June 3, 2012

DIY Growth Chart

I was surfing around on Pinterest and found a DIY Growth Chart by Cozy.Cottage.Cute. I pinned it to my Pinterest Gift Board . I have many great ideas pinned there if you would like to look around.

I thought this would make a great gift for my friend's daughter who is expecting twins. I followed the tutorial, but I used Western Cedar instead because I like the lightness of it and the roughness for a modern rustic look.


Saturday, June 2, 2012

DIY Baby Burp Cloths

Recently, I found some cloth diapers from Wal-Mart online. I ordered them, and picked up a multi pack of fabric fat quarters in the craft section. I brought it home so I could put together some burp cloths. I had these when I had both of my children many years ago. I think they will come in handy again with a granddaughter on the way.


The first thing you do is wash, dry, iron, and trim up your fabrics. You always want the wash out the sizing before you sew.


Next, put the right side of the fabric against the cloth diaper and pin it down.

Then you will sew up the three sides. Turn it right side out and iron it in place. Fold under the fourth side and press it down. Now add a stitch across it to seal it. Press it again.


The last thing is to run a line of stitching up on each side of the center piece. The center piece is thicker because if it were being used as a diaper, it would be the area to hold the most moisture.
I always give it a final press and fold it up tidy.

You can make these really quick and tie them up with a pretty bow!

Monday, May 28, 2012

Quick and Easy Nursery Wall Hanging

My Friend dropped in last weekend for a quick visit to pick up her daughter, I thought! She actually stopped by not only to get her daughter, but needed some help with a gift idea.

She was headed to a baby shower that afternoon and had picked up a fat quarter of fabric and a few monogrammed wooden letters.


I pulled out my paint tray and brushes. She got busy right away and painted the wooden letters. We used a hair dryer to quickly dry them.

I just so happened to have a cabinet door I pulled out of a storage unit. It was a sample left over from when my father was purchasing new cabinets. I knew when I saw that door that I could make something with it, but I just had not decided what exactly. So I told Corbey...let's use this. 

We flipped it over and added a hanger to the back side.

After the letters dried, we measured the center of the cabinet. Corbey cut a piece of fabric to fit the center perfectly.


Then we mod podged the center with a generous coat and placed the fabric on it. I air dried it for a few minutes to speed up the process.

The next thing we did was use a dab of all purpose Gorilla glue to the letters with a dab of hot glue so that the hot glue would hold it on there while the craft glue dried. I don't always trust hot glue on a slick surface. The Gorilla glue will be completely dried in 24 hours so that is fool proof.


It turned out great. We put it in the backside of the basket and tada! It took less than 20 minutes. After it was done, I was like "Wait I need some pics!" Too late. Here is what I got...


I just love barn sales. There is this terrific barn down the road at Sunny Patch Farms. About twice a year they open their doors to the public. It is always a great day. I spent all morning milling around and visiting with many friends, helping others to load their treasures, and then panicking that I myself had found nothing except the one thing that I have been waiting for since last fall, a vintage glam mirror and taper candle set (sconce). I will post my makeover on that another day. The item was so high up, I have to go back later to pick it up!


The barn sale
These Pictures are a little blurry. I was sneaking in a few photos :).


While scanning the walls, alleys, and vendors, I found a great vintage bird on a dogwood set for $12.00. Yes it is worth $12.00. After all, this is not a garage sale we are talking about it is a barn sale. :) Big Difference.


OOOh the excitement. I brought my little birds home and gave them a good scrubbing in the sink with a bristle brush and Dawn detergent. Once it dried thoroughly, I gave it a nice coat of Rustoleum Painters Touch Ultra Cover in Gloss White for plastic. This spray paint is 2x the coverage and dries quickly. I love that!  Once it dried, I gave it another coat making sure to cover almost all of the nooks and crannies.


Then I took 220 sandpaper and gave it a light rub on the areas that I wanted to accent the most. I rubbed the sandpaper across the edges of the flowers, the middle of the flowers, and certain areas of the bird such as the feathers to pull a little of the old color through.


Now it is time to clean it up again. Making sure to get all the loose pieces off the little birds in the process. I want them to be super clean.

If you want to take it a step further, you can rub a coat of Valspar Antique Glaze on them.


Wait a minute, then use a soft cloth or soft paper towel and gently rub it into the distressed areas wiping off all excess. It will give it more of a wooden look by darkening the distressed areas. If it looks too dirty or too dark in one spot--no worries, just dampen your cloth and wipe over it to clean it off. I would not wait too long to rub in your glaze. It dries quickly.


Now they are ready to shine. Where to put them?? On my hand made grape vine wreath for the time being! I am off the help my sister with 60 baby Tamworth pigs!


Tickled Herring


Thursday, May 17, 2012

Mason Jar Triple Mounted Vase

As seen on Pinterest...


I was surfing around on Pinterest and found a tutorial for a Mason Jar Wall Planter by Craftzine, as well as this one for a Mason Jar Storage by Liz Marie. The pins will take you to their sites. I followed the tutorials listed and within an hour, I had three of these babies!

It was very easy and inexpensive to make. I am thinking about a pencil jar for a teacher now :) on a single board since it is the end of the school year, but that means I would have to make 7. Yikes!

Tickled Herring

Saturday, January 14, 2012

Toilet Paper Storage Box

My hubby wants extra rolls of toilet paper in the potty room. It drives me insane to have extra toilet paper sitting on the back of the toilet. I think it looks tacky.  I guess that is why some companies have placed toilet paper backup roll holders on the market. I just really don't like the designs that I have seen so far. Some look like they are covered in wallpaper from the 60's. Not my style at all!


I decided to give ol' dad a call and busy up his day! He was available too. I am so lucky.

The first thing that we did together is figure out how big it should be. I measured the tank and the toilet paper rolls. Then I decided to stretch it to fit a whopping three rolls. I would suggest one maybe two for anyone out there interested.

The next thing I did, was pull out some scrap wood from building my house. We three pieces the length. We ran them through the planer.


Gave them a quick sanding. Brushed off the loose particles. Then we glued the three pieces together.


Next we shot a few nails into them for a more permanent hold. My Dad has all kinds of neat tools. I just get to supervise mostly when we work together. He loves that! :)


Once that was completed, we cut two pieces the length and width of the end. Then we glued and nailed them on as well.


For the lid, I had some slats that we cut the length and trimmed the edges to fit with a small 1/4" lip over the top on three sides. I kept the backside flush so it doesn't hit the wall.


I glued them together. Once the glue dried, we added two small blocks under the lid to keep it from being knocked off easily. This was the trickiest part of all. You have to measure from the side of the lid to width of the board on the side of the box and add the lip. Then you repeat for the front. Do this on both sides and nail the blocks in place.


Once that part was complete. I sanded it again  with 180 sandpaper. I wiped it clean of all particulate matter. Then I added a coat of spray paint in rubbed bronze color.


After the paint dried, I used Gorilla Wood Glue to add a handle. For the handle, we just cut a piece of 1x2 and trimmed off the two corners at an angle. You can see it above in the bottom right corner. The shade makes it appear larger than it really is.

Once it was dried, I put it on the toilet tank and filled it with three rolls of toilet paper.


If I had to do it over, I would have made it just for one roll, or a tall tower that stands on the ground. I love it though, and I can't think of a better way to spend my day then with my Dad.  

Spruced Up Book Rack--Thrift Store Find

I got this ugly old book rack at the thrift store last year. I decided since I had made the canvas art and toilet paper storage box for my bathroom that I would spruce this up too. I added a coat of spray paint in rubbed bronze color.  


 Next I added a few half circle accordions and hot glued them to the front. That was it for this project. I really don't like reading material in the restroom--but I don't get to decide on everything in my king's castle.


Well, it really does look better than it did. Haha.

Bathroom Wall Art Made Easy


My walls in my bathrooms are pretty bare in my house, because I never know what to put on them. Every time I make a trip to visit my mom, we go to the art store. I know exactly where I get it from. I am right in the middle of painting her bathroom cabinets, when she approaches me to say... "I want to go to the art store when you get done". LOL. "Okay mom..." and off we go while waiting for the cabinets to dry before a second coat. She doesn't have to tell me twice!

During our frequent visits to the art store, I always find myself milling around the canvases. Shortly after, I of course have purchased whatever is on sale. It is usually a 2 for 1 deal that I am proud to bring home and stack up under my desk for a rainy day. I also have filing, computer work, etc. to do on rainy days, and it seems we have been in a drought for two+ years.  Needless to say my canvases are starting to get in my way. :o). I just never can settle on what I want on my own walls. I just don't know why but I draw a blank every time I try to create something for myself.

After being tired of lazing around today, I decided to get it together and make something for my bathroom walls. I decided why not start with the interior walls that no one visits, but me. That way, if it looks bad, I won't have to be embarrassed.

I got a new Cameo Silhouette for my birthday and I haven't really played with it much since. I know that is crazy! So today is the Cameo's lucky day.

I pulled out two small canvases that I got for a total of $3.99 on sale. They will be perfect since my bathroom is not very spacious.


I painted the canvas with a color of my choice, #456 True Burgundy from Folk Art. Folk Art paint sales for between $0.97-$2.00 at your local Wally World. I can't remember the exact amount.


Once the canvas was dry, I used my Cameo to cut vinyl "No. 1" and "No. 2". Yes you guessed right! It is going right over my little potty too. I peeled the stickers and added them.

If you don't have a Silhouette or a Cricut, then you have choices. You can either print, press & trace, then paint in the outline left on the canvas. You can cut and mod podge (1/2 glue and 1/2 water) the letters and numbers on if you don't have a vinyl cutter. Another option would be to email your word document to your local vinyl or sign store and they will cut it for you at a low cost.


I also added some hot glue to the backside of a few mod accordion circles made from a previous post. You can access that here.


I hung them on the wall and tadah!!


It is simple, quick, and inexpensive! That is the best part. :o)