Tuesday, September 27, 2011

DIY Stenciled and Hand Painted T-Shirt


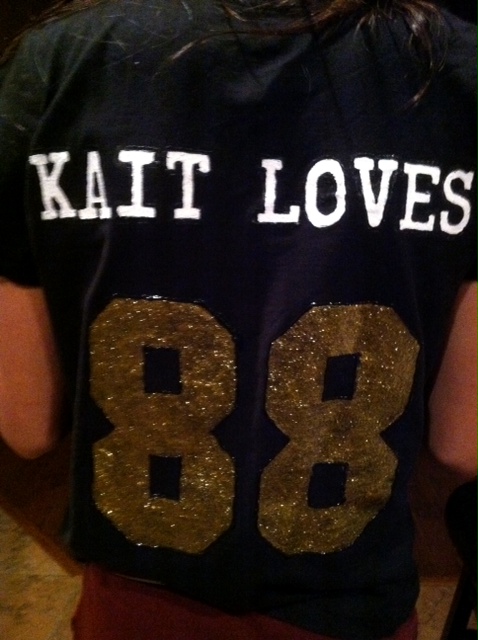
The "K" and hearts were not a stencil. :0) The white smeared a little is for a distressed look.

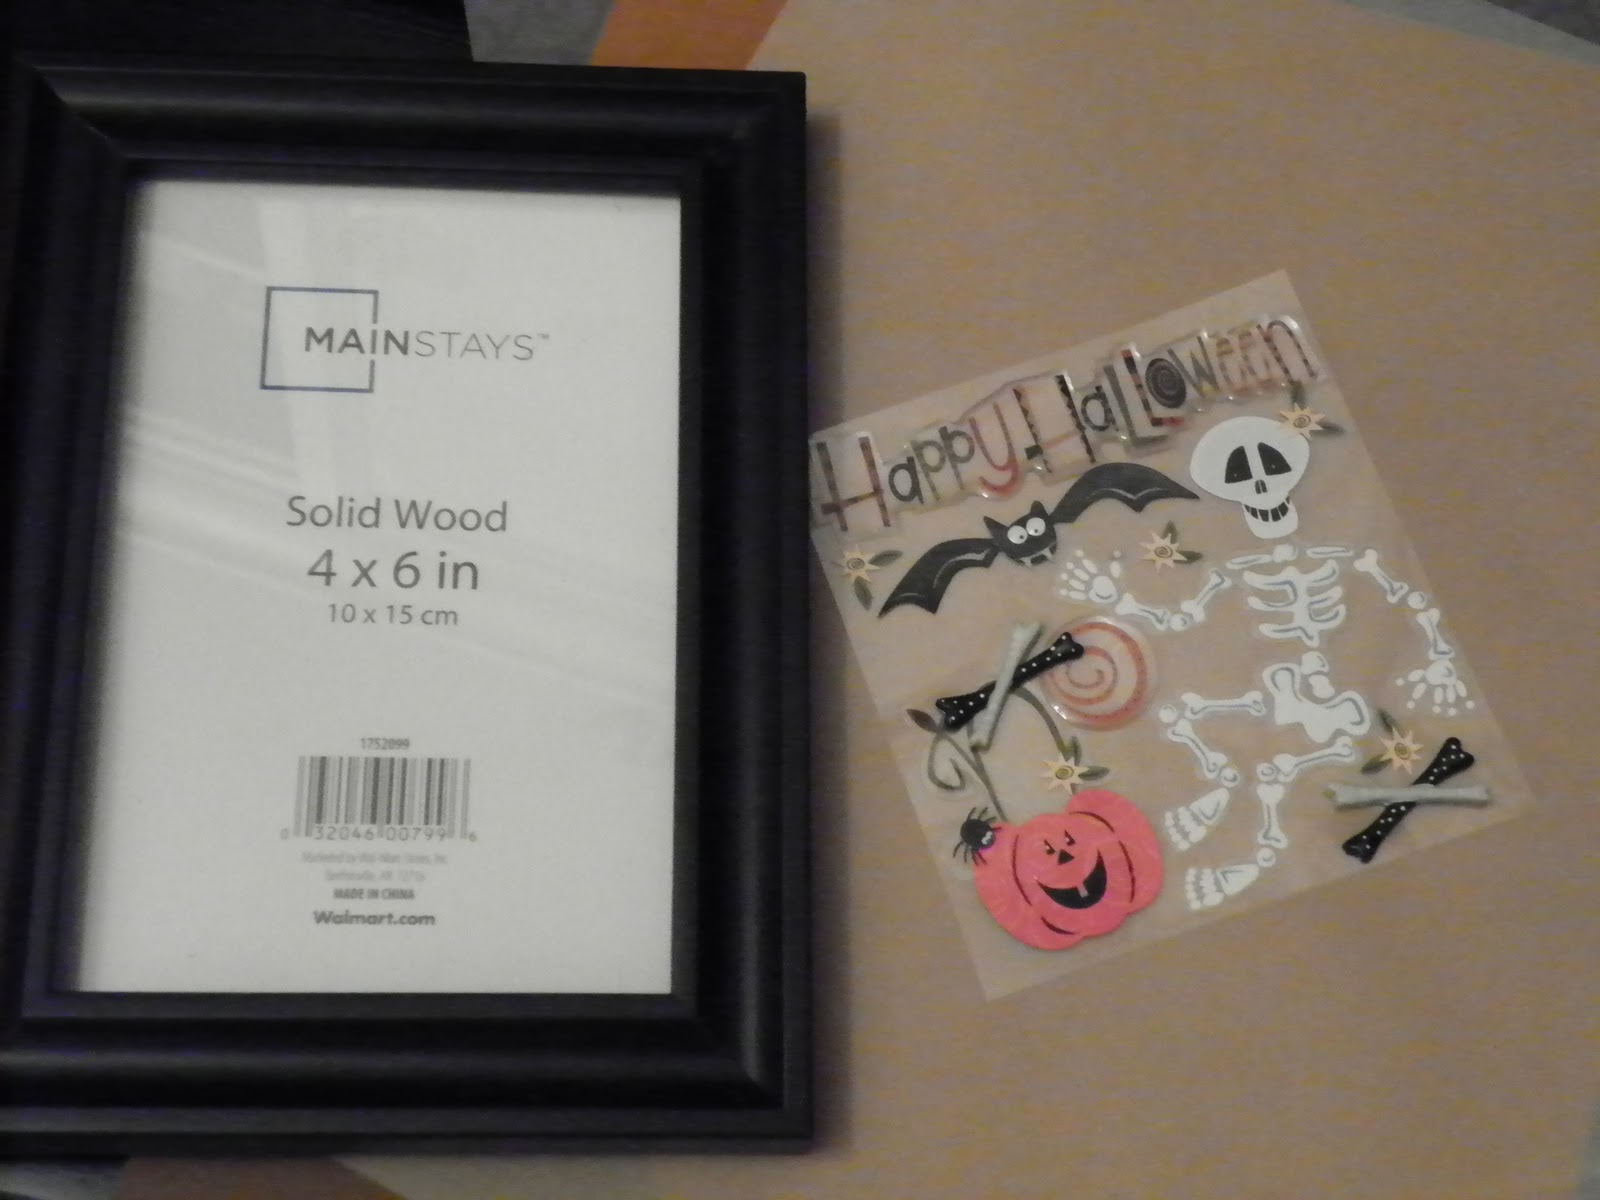
What you will need is tweezers, masking or duct tape, scissors, paint brushes or sponges, poster board or heavy paper, a computer, printer, Tulip Fabric Paint, Exacto knife or cutting tool, cutting mat/board/cardboard, cardboard or board for the shirt, spray glue (optional), and a t-shirt.


The first thing you do is wash and dry your shirt if it is new to remove the sizing in it. Now pull your shirt over a shirt board or a piece of cardboard so you can paint on it without it seeping through the layers of material.


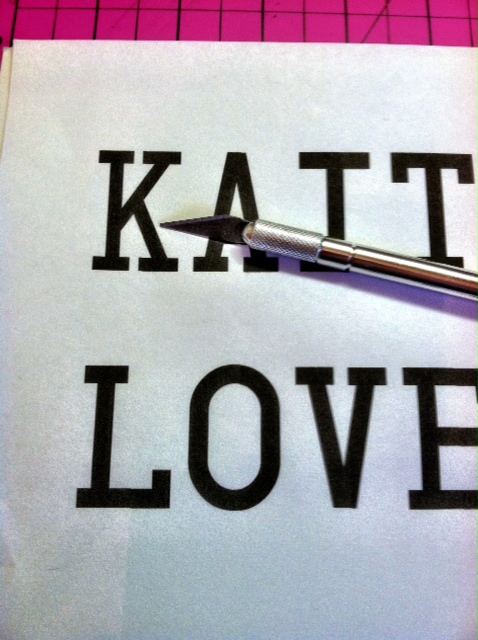
On the computer pick a font and size that will work with the space between the shoulders of your shirt. Once you have the right words and font print it and trim off the excess edges. Now tape or spray glue it to your posterboard and cut out the lettering with your Exacto knife, razor knife, or scissors.


Trim off the edges, but keep at least 1 inch on each side of the words for a border.


Add tape to the edges so you can attach it to the shirt.


Using a paintbrush or sponge brush, dab the t-shirt paint onto the stencil's open areas. Press firmly on the stencil while dabbing it so you don't get paint under the stencil.


You will need to do between 2-3 coats depending on the color of your shirt vs the color of your paint.


Peel off the stencil. You may need tweezers. Be careful not to smear paint! Allow for drying time. We are impatient so we are speeding it up with a dryer.


Touch up any areas needing it. And dry again...


Cover the dried lettering with a towel and iron over the lettered area then wash it.


Thursday, September 22, 2011

Buck Head Silhouette on Canvas


After visiting Under The Table and Dreaming by Stephanie Lynn,  I loved her tutorial on her
Deer Head Silhouette. 


Materials:
Artists canvas
Two Colors of Paint
Pencil
Eraser
Paint Brush


I painted the backgound on the canvas a blueish gray color of house paint that I had left over.

Once it dried, I painted the edges to match. I pencil drew a silhouette of a buck onto the canvas and used the eraser to fix any errors.


I painted the buck with the color of paint I had left from my walls.

I chose to make my buck looking to the side, I did not have a projector so I just freehand drew on my deer. I like her deer's antlers better.

Here it is on my wall. I really like it. Thanks for the tutorial Stephanie Lynn!

Halloween Treat Tree DIY


I had this old Halloween bucket that I had gotten at Sams full of candy one year and saved it ever since. I pulled it out of the closet trying to think of what I could do to doctor it up. I decided to make it into a treat tree for my children. They always love surprises, so I can't wait til they see this one. Problem will be keeping them on a discipline of one treat per day! Kind of like an advent calendar, but for Halloween instead.


 I started with tracing a circle onto a foam board. I cut inside the circle about 1/4 inch so that the circle will fit down inside the bucket.


I checked to make sure it fit, then I painted it black with spray paint and let it dry. While it was drying, I took a walk and found some tree branches.


Jackpot! I picked a few branches and cleaned them from loose debris.


The next thing I did was cut an "X" where I wanted to stick the limbs from tree branches.


I found that adding balled up bags into the bucket helped with the stability of the branches. So I filled the bucket with some bags waiting to be recycled.


I added the branches to the bucket. It's looking good so far!!


I hot glued the ribbons to the treats and made a loop on the opposite end. Time to hang the treats!!


And fill the bottom of the bucket with candies over the top of the foam board.


It really turned out cute. My kids are gonna love it!!

Tuesday, September 20, 2011

Framed Halloween Decor For Under $5


I got my frame from Walmart for less than a dollar! The scrapbook paper costs about $0.70 and the Halloween scrapbook stickers were about $3.00. They were the most expensive thing.


Cut your paper to fit the glass. I am using two sheets because one is similar to glassine paper.


Add the scrapbook or other type of stickers to your scrapbook paper. Now put it all together.
I stuck to sets of bones to the top corners of the frame from the scrapbook stickers I had.


 I turned out to be so cute!

Halloween Subway Sign


The first thing I did was get some cut wood at Lowes. Sand the edges and sides.


Next paint the wood the color of your choice.  I am using a flat black paint by Plaid to cover the wood.


Allow for drying time.


Once it has dried, drill two holes into the top the size you would like depending on if you are using rope, twine, ribbon, or fabric.

Now, paint the holes to match the board.


Once that is dry, then it is time to either distress and then attach your stickers with a hot glue gun, or just attach the stickers. I chose to distress mine a bit with some sand paper, and then I wiped a brown shoe polish gently over the sanded areas.


Last I added a strip of scrap fabric I had on hand and tied it in a knot, trimmed the ends, and hung it on the wall.

Wednesday, September 7, 2011

Redneck Wine Glasses using Mason Jars


Alright I have been waiting for this moment for over two weeks now. While shopping for a gift for one of my life long friends, I saw this Redneck Wine Glass at a gift shop. I was ecstatic. I live in a rural area and we actually prefer mason jars most of the time over glasses. They just hold so much more sweet tea! I even have packed up after school snacks and filled mason jars with ice and soda and covered them with a lid and drove off to the school in between sport events. 


After seeing them, I rushed home because I was quite sure all I needed was some E6000 glue, glass candlesticks, sandpaper, and mason jars with or without lids.  I had to order the candlesticks from Dollar Tree Direct. The candlesticks are made by Crisa and they are 4 1/2 inches tall at $1 per candlestick! You pay no shipping either if you have it sent to the store directly!

My glass candlesticks finally came in, but I find that I am at a loss for E6000 glue. I usually can find it anywhere, but lately all shops are out. I guess Christmas is just around the corner! I will be using a different brand of epoxy made by Devcon. It is the Devcon High Strength 5 Minute Epoxy I found at Lowes for glass so it should work fine. I am just use to the easiness of the E6000—one squirt and you are on your way. What I have looks to be a little more difficult, but we will see in the end.


I am using a coarse sand paper. I chose 3M 80 grit for this project. It makes it easier and quicker to rough up glass.


The last thing I need for this project is Mason Jars of course. I definitely have plenty!        


Let's get started.

The first thing I did was take a piece of course sand paper and rub it against the inside of the candlestick to roughen the top edges where the glue will be placed. I also flipped the jar over and roughened up the center of the bottom of the jar where the candlestick would be attached.


Once this was done, I cleaned off the dust with a clean towel.


Next, I followed the directions for my epoxy. Devcon's Five Minute Epoxy has to be mixed together in a plastic container. When I finished mixing the epoxy, I place a layer of glue on the bottom of the jar and on the top of the candlestick.


With the jar upside down, flip the candlestick with glue upside down too and place it in the center of your jar's bottom. Place a heavy item on the top of the candlestick like a book and let it sit. The good thing about Devcon's 5 Minute Epoxy is that it sets in 5 minutes of course! I waited 15 minutes for it to be handled and then 1 hour for usage.


I washed the glass and put it to use!


My husband does not like the normal size wine glass, so the one I saw in the gift shop had a small jar usually used for jelly. I knew that would not work for him because he likes ice in his red wine! So he gets an XL Redneck Wine Glass just for him.


You can add them to your buffet filled with jelly you scoop into it or other sauces for an ultra cool look. Also, in my picture, I did not add the lids since we are using them for glasses, but you can definitely do that as well!


It is dishwasher safe, but I found that the epoxy yellowed a tiny bit. I would recommend hand washing unless you don't care. You can only see it if you flip it upside down and look where it is attached. :)