Monday, June 18, 2012

Kim and Danny's Wine Rack


 Just want to shout out how awesome this wine rack turned out by Danny for his wonderful wife Kim.

You can use pallets or wood from the lumber yard stained with a wool pad soaked overnight in vinegar to get the aged look. They used a crate the for top picture and hung it directly to the wall making it a shelf!

I think this is just so awesome! Good job Danny--lucky Kim!

Here are some tutorials I found for this: tutorial 1 and tutorial 2 .


***Be sure to always wear eye, mouth, and hand protection when working with pallets!


Big Cheer Bow DIY

Cheer Bows Must Be Big!


For this you will need the following:

Three sizes of ribbon ( We used 1 3/8", 1/4", 7/8")
FabriTac Glue or a Sewing Machine
String or Zip Tie
Hot Glue Gun with Glue
Scissors
No Fray or Lighter
Ruler
Hair Band


On Pinterest, I found this tutorial by TotallyTheBomb. I followed it with a little deviation.


The first thing we did was to cut the 7/8" ribbon to 30 inches for the center. Then we cut 2 pieces of each: 1 3/8" and 1/4" ribbon to 30 inches.

Then we laid out the base 1 3/8" two ribbons side by side. We used Fabritac to the backside of the middle 7/8" ribbon and made sure to coat the edges as well as the middle with the glue. Work quickly, because the glue dries fast. Lay the middle ribbon on the base 2 ribbons. Press and allow time to dry. Once dried, we added a thin ribbon to each side to frame it and show it off a bit. On the polka dot photo, we sewed the ribbons on. You can see that the ribbon with the Fabritac lays flat nicer while the sewn ribbon puckers. -See above.


Taking the ribbon as shown above, loop and fold it across. It will look like an awareness ribbon. Take the top of the loop and bring it downward to form the bow. Now, pinch the center and tie off with a zip tie or string cinching it tight. This makes a bow. :) 


Next, using the same ribbon for the middle, tie a knot and cut about two inches above and below the knot. Hot glue the knot to the front of the bow. On the back of the bow, take the knotted piece and wrap it around a hair band then hot glue it down and trim off the extra.  Fold the bottom of the ribbon and cut from the outside upward if you like the inverted "V" look. If not, then just trim the edges. Be sure to either quick burn the end of the bow (adults only) or use a no fray solution.


Fabric Dry Erase Frame

While scanning ideas on Pinterest, I came across this Burlap Dry Erase Board posted by JillRuth. I had everything to make it so I re-made my previous post for a dry erase frame.
It is simple, but I love it in white!


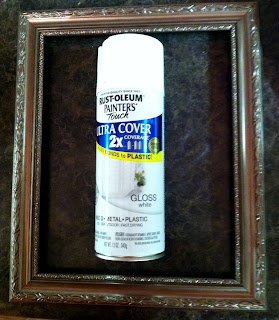
The first thing I did was clean my plastic frame off and use a plastic friendly spray paint to coat it. I sprayed two coats on it and let it dry overnight.


I cut a piece of fabric resembling burlap, but with a tight weave, and placed it in the frame with a piece of card stock behind it to hide the black backboard to the frame.

The only thing I noticed after taking this photo is that there is a little pucker in the bottom right corner. I probably should have taped the fabric around the card stock and backboard for a tighter fit.

Sunday, June 3, 2012

DIY Growth Chart

I was surfing around on Pinterest and found a DIY Growth Chart by Cozy.Cottage.Cute. I pinned it to my Pinterest Gift Board . I have many great ideas pinned there if you would like to look around.

I thought this would make a great gift for my friend's daughter who is expecting twins. I followed the tutorial, but I used Western Cedar instead because I like the lightness of it and the roughness for a modern rustic look.


Saturday, June 2, 2012

DIY Baby Burp Cloths

Recently, I found some cloth diapers from Wal-Mart online. I ordered them, and picked up a multi pack of fabric fat quarters in the craft section. I brought it home so I could put together some burp cloths. I had these when I had both of my children many years ago. I think they will come in handy again with a granddaughter on the way.


The first thing you do is wash, dry, iron, and trim up your fabrics. You always want the wash out the sizing before you sew.


Next, put the right side of the fabric against the cloth diaper and pin it down.

Then you will sew up the three sides. Turn it right side out and iron it in place. Fold under the fourth side and press it down. Now add a stitch across it to seal it. Press it again.


The last thing is to run a line of stitching up on each side of the center piece. The center piece is thicker because if it were being used as a diaper, it would be the area to hold the most moisture.
I always give it a final press and fold it up tidy.

You can make these really quick and tie them up with a pretty bow!