Saturday, October 15, 2011

DIY Remade Frames


I made a trip by a friends house one day to pick something up to find she and her friends were having a garage sale. I found a set of three picture frames with two of the same print and one of the same theme. The one that was different had a flower in the middle. I really didn't like the picture framed inside them, so I started breaking them down.


 Sorry for the blurry photo. I really need a camera instead of my iPhone...


I removed the matte and glass. I tore off the picture from the back cardboard piece and trashed it.


I painted the frames a glossy black with spray paint. They look great already!


I also spray painted the mattes a tan color that I had. I assembled all the pieces back together and glued on the photos I made scrapbook sizes for this frame through Smilebox. I really love that software program it is so easy to use.

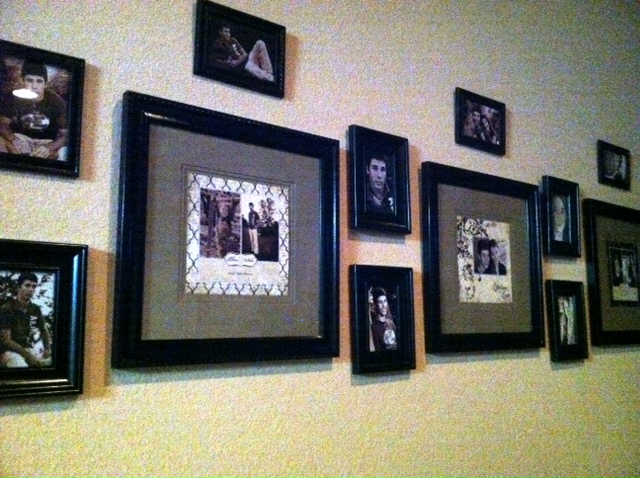


I got the smaller frames from the DollarTree and sprayed painted them as well to make them look more chic and less drab. I measured twice and nailed once a finishing nail into the wall to hang the frames. I made a pattern as best as I could. I had a little more of the smaller sized frames than I had the larger sized 4x6s. I plan to hang a little something between the ends where there is a larger space between the two vertical frames later.

Since I already had the spray paint, the yard sale frames 20x20 were a total of $1.25 thanks to Vickey! The smaller frames were $1 each. The prints I changed from color to black and white cost about $0.15 each and the scrapbook sized prints were about $3 or less at Wal-mart.

The entire grouping really covers my wall well. And I love it because from the kitchen view, it flows right into the hallway.


I will definitely have to go back and straighten some the the frames up... but not now I am done for the day. /:

Happy crafting!
K.

Thursday, October 6, 2011

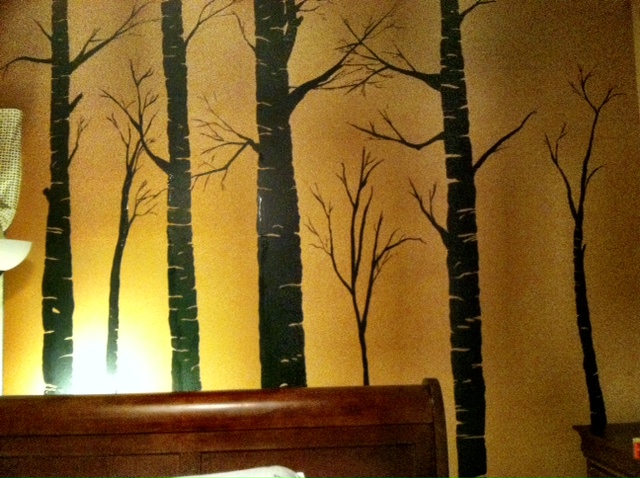
DIY Faux Trees Wall Stickers/Decals-Painted Trees Wall Art


 I have wanted to paint trees in my son's room for some time now, I have just been too afraid to do it. I finally got the courage and this is the outcome...I love it!


The photo above was one of my inspirations.


I used Valspar Satin Finish Interior Signature Colors in Black. You only need about 1/4 of a quart. My ceilings are 10' tall, and I still have a lot of paint left to use for more projects!


I just had to start with the paint because once I did, I knew there was not turning back. I can be a chicken at times and a bulldog when I need to be. :) My Uncle John always said when my Granny set her mind to do something, she was like a bulldog with a bone. I think I get some of that from her.  


Forgive the photo, the sun went down... I basically started making boxes one on top of the other with a space in between. I either filled in the center of the box or left an area inside it empty. Sometimes I made an opening above the small boxes and then continued on to make slits in the side of the tree. I did my best not to create a special pattern so it would be random. I did however try to keep the base a little larger and the top a little more narrow until I realized I had three trees slanting to the left side.


Once the trunks were done, I added branches one at a time.


I continued making trees until I realized some were slanting to the left (3 of them). What to do?


Add more trees slanting to the right to offset it and I enlarged the trunks on one side only about midway to the ground on 2 trees slanting to the left on the opposite side. For clarification I added an inch or two to the left side where it was slanting towards the left to straighten up the trees a bit.


Side view.

Overall, I really like it. A sponge brush really helped to get through it quicker, but I chose to use paintbrushes for the more intricate parts and the thinner branches.

I am going to do more to it later. Maybe I will add two birds one above the window next to the trees and a nest possibly. I will figure it out in time, but for now I need to take an artist break and the idea will come as well as the urge to get back in there! For now, I have three frames calling my name and a blank mind to fill them!

Keep on Craftin'!

-K

Wednesday, October 5, 2011

Update on the Silly Fish Picture


I just wanted to show off the picture with a western cedar frame that looks similar to drift wood... It looks great!


And here are some of the originals that I got the idea from...